Nikon Eclipse 50i Microscope (part 2)

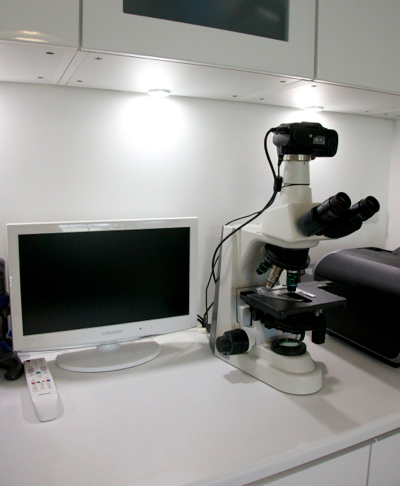
Above is a picture of my purpose built lab. It is not as fancy as it sounds as I basically bought kitchen furniture on sale from the local DIY store and spent a few days fitting them to one of the walls of my studio. The all glossy white finish does looks very purposeful, belying its humble roots. I routed lots of cables behind the furniture, accessible through nicely finished holes in the work surface. The microscope has a permanent Nikon D5000 mounted and connected to my Mac Pro via USB, to a samsung HDTV via HDMI and fitted with an Eye-Fi SD card. This was to cover all angles as HDMI and USB share the same output on the Nikon and only one can be connected at the same time. I can choose to use the USB and work tethered to the computer or connect the HDMI, use the HDTV to work and focus and have the Eye-Fi card send the images to the computer as they are taken.
Figuring out the complex 50i is reasonably straightforward. All the possible adjustments tend to have proportional feedback so one just needs to keep twisting while the image improves and stop when it degrades. This works with the focus, obviously, but also all the diaphragms, stops and filters. Only the illuminator condenser focusing is slightly less intuitive. Most of the controls are reasonably accessible but none apart from focus and stage movement are really intuitive or ergonomic. Fortunately, the microscope was built to be handled by slightly careless lab assistants and is quite foolproof and resistant. Handling the microscope is not the difficult part though..
The real challenge in photomicrography is in preparing the subjects on slides. It is really an art and knowing how to use the bewildering array of slides, cover slips tints and mountant chemicals is only part of the difficulty. As with wildlife photography, the real problem is in finding and approaching your subject.
Depending on the slide you are using, you will only be able to present a fraction of a water drop to your microscope. In that drop you will need to find the organism you are looking for, isolated enough to make a good picture. Using any mountant will kill your subject, making it much more difficult to find but easier to photograph.
Unfortunately, all this specialised knowledge is difficult to learn as there are only a handful of books describing the process, most dating back from the last century an the remainder very dry and poorly illustrated. The good side is that experimentation is cheap, usually rewarding and fun. Note the Micscape web site www.microscopy-uk.org.uk which is a treasure trove of information available nowhere else this side of a PhD in biology.
I am in the middle of this process, having worked with microscopes for the last year and slowly learning the ropes. The first big hint I got is that many interesting subjects are actually rather large at between 1 and 1/10th of a millimetre. At that size, the best magnification to use is 40x (a 4x objective and 10x eyepiece), a figure usually considered “lame” by newcomers. The second was the discovery of tardigrades. Those largely ignored animals are so odd that their 750 species actually have a phylum of their own and are even considered potentially extraterrestrial by some authors. The best information about them on the web is there: http://www.baertierchen.de/si_engl.html and is well worth reading by any one interested in the small world around us. Wherever you are, you could be watching a tardigrade within one hour with the easily followed instructions. By the sea, collecting any visible plankton, like young shrimp, will work pretty much the same. You will be able to see your subject, which will be a tremendous help in its isolation. Plankton will need to be calmed down (ie killed or severely sedated...) before observation but this is easily done with isopropyl alcohol. Mixing your water sample with 30% alcohol will also have the effect of concentrating it as most interesting organisms will sink to the bottom.
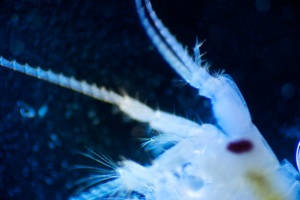
Once you do have a subject, the next rather large issue will be the extremely limited depth of field. Animals are usually three dimensional and the thin slice imaged by the microscope will usually not be enough to describe them well. Fortunately, the computer comes to the rescue with the help of rather remarkable software such as Helicon Focus http://www.heliconsoft.com/heliconfocus.html . Helicon Focus will take a series of images focused at different distances, determine which parts of the subject are sharper in each frame and blend the whole to give an extreme depth of field in the final image. It works for any sort of immobile subject but really shines with macro photography and photomicrography. The shrimp head above is the result of 28 frames at 100x passed through Helicon Focus. Below is one of the single frames showing the extremely limited depth of field:
I have spent a long time trying to source microscopy supplies without having to go through a laboratory supply company as those usually don’t want to deal with individuals. Only a handful of sources are available in the UK and I will talk about these and what I bought from them in the next article.
6 July 2009